How mods are made for Unity games
Chapter 2: How to write a mod in C#
In this chapter, we will examine how to write a Beat Saber mod in C# using BSIPA and what common problems we need to solve to make a mod for a Unity game. We will also look at Harmony, a library to modify code in runtime, used in mods for RimWorld, Battletech, Cities: Skylines, and many other games. Everything written here is suitable, with some assumptions, for any Unity game based on Mono and running on Windows.
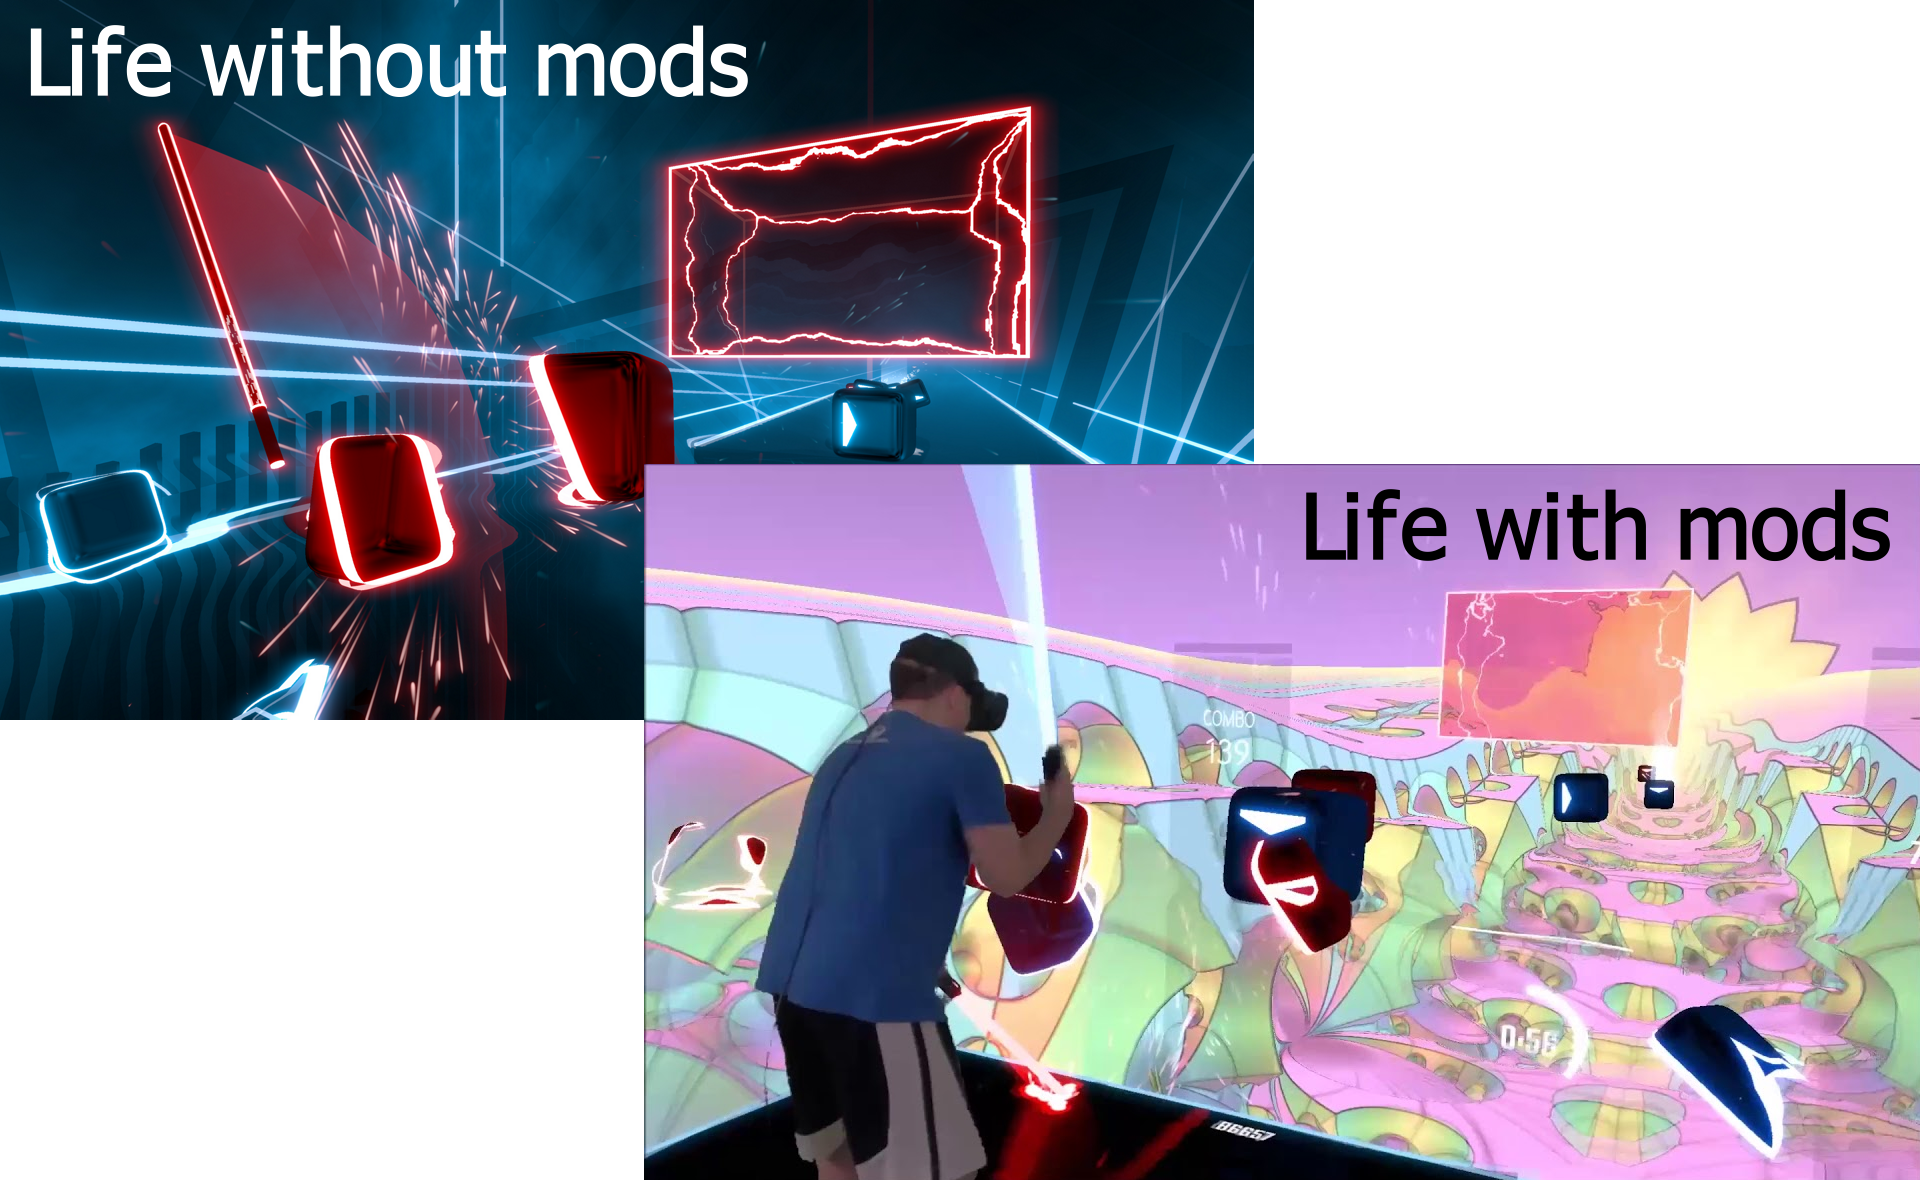 Image sources:
 About Beat Saber and a mod we are going to write
Beat Saber is one of the most popular games for VR headsets. If you have one, you most probably know about this game. If not, then you might have seen one of the game videos on Youtube in the Recommended section.
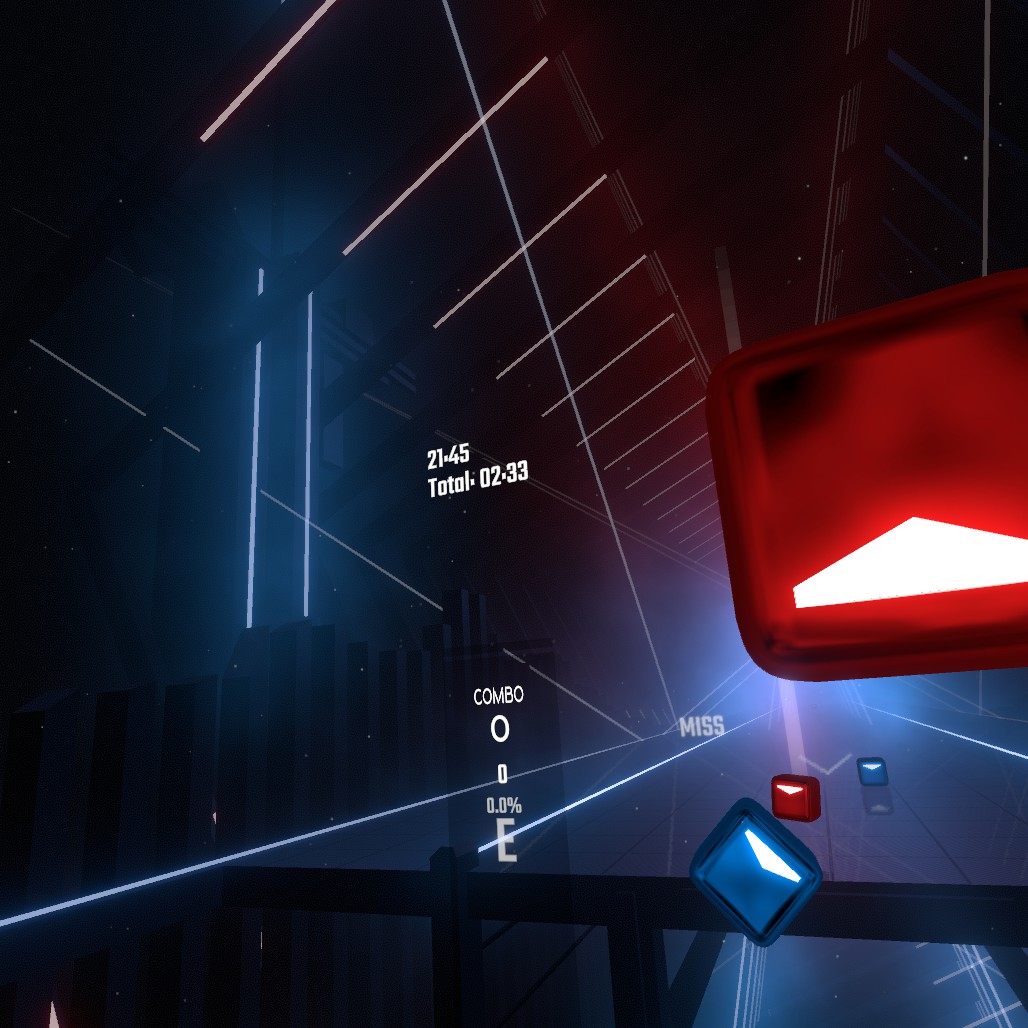
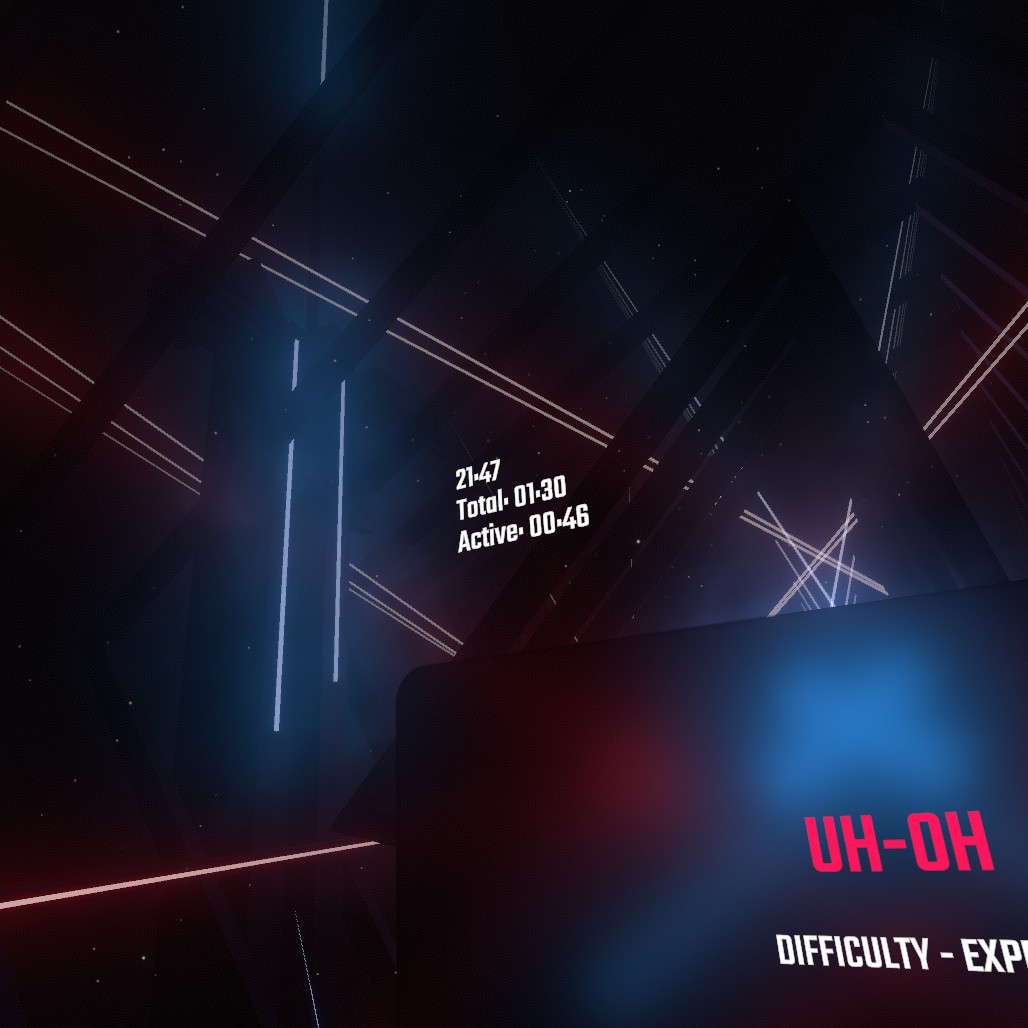
Let’s write a mod that shows time spent in the game in the current session. It will show current clock time, total time spent in the current session, and time actively spent in the current session, i.e., in the core game hitting notes with sabers.
Preparations
First of all, we need to make the game working with mods. For Beat Saber, we need to download ModAssistant, configure it, and install mandatory mods BSIPA and BS_Utils. The mods are injected, and the game is ready to run.
For other games, you need to either find a plugin injector used there or check the chapter 1 and inject them yourself.
Disclaimer about versions
Everything written here works at least with Beat Saber 1.9.1 and BSIPA 4.0.5. There might be critical changes in the future for the game and the mod injector, which are not compatible with the article.
Step 0: Minimal working mod
At this step, we will create a C# project and a minimal set of entities that we need to verify that the mod is loaded by the mod injector and is instantiated. The first steps are written well in Beat Saber Modding Group’s website (BSMG). There are multiple Visual Studio project templates suggested that can be used to create a new project configured to work with BSIPA.
Let’s create a project from scratch. Just take a favorite C# IDE (I use JetBrains Rider), create a new C# project, pick Class Library as a target and pick a .NET version compatible with Unity (I use 4.7.2). We have an empty project. Now it’s time to create mod files.
manifest.json
It’s a JSON file with metadata for BSIPA. It must be marked as EmbeddedResource to be added to the output DLL file.
{
  "$schema": "https://github.com/beat-saber-modding-group/BSIPA-MetadataFileSchema/blob/master/Schema.json",
  "author": "fck_r_sns",
  "description": "A mod to track active time spent in the game",
  "gameVersion": "1.9.0",
  "id": "BeatSaberTimeTracker",
  "name": "BeatSaberTimeTracker",
  "version": "0.0.1-alpha",
  "dependsOn": {}
}
$schema references a schema definition in the BSIPA repository files and is needed for JSON format validation. dependsOn is used to help BSIPA build the plugin loading order. gameVersion and version use semantic versioning (SemVer) format: major.minor.patch.
Plugin.cs
We need to create a class that will be used as an entry point for the mod. For BSIPA 3, we needed to write a class implementing an interface IBeatSaberPlugin. BSIPA 3 used Mono.Cecil to read all classes from a mod’s DLL file, searched for the one implementing IBeatSaberPlugin, and instantiated it. In BSIPA 4, IBeatSaberPlugin was removed and replaced with attributes. To mark a class as an entry point, we need to use a class attribute [Plugin] and method attributes [Init], [OnStart], and [OnExit].
using IPA;
using Logger = IPA.Logging.Logger;

namespace BeatSaberTimeTracker
{
    [Plugin(RuntimeOptions.SingleStartInit)]
    internal class Plugin
    {
        public static Logger logger { get; private set; }

        [Init]
        public Plugin(Logger logger)
        {
            Plugin.logger = logger;
            logger.Debug("Init");
        }

        [OnStart]
        public void OnStart()
        {
            logger.Debug("OnStart");
        }

        [OnExit]
        public void OnExit()
        {
            logger.Debug("OnExit");
        }
    }
}
SingleStartInit means that the mod is initialized once the game starts. The other option is DynamicInit, which makes a mod disableable and enableable in runtime.
The class name can be any, but in most cases, it is called Plugin. The namespace must be the same as the one used in the manifest.json (BeatSaberTimeTracker in our case). At this step, the mod logs all the method calls into a file.
To build it, we need to resolve dependencies. The attributes are defined in IPA.Loader.dll. We already injected mods using ModAssistant, and therefore all the required files are in the game folders. IPA.Loader.dll can be found in Beat Saber/Beat Saber_Data/Managed in the Steam folder (assuming that we have a Steam version of Beat Saber). The usual way to resolve dependencies is to add them directly from the game folder. BSMG suggests it.
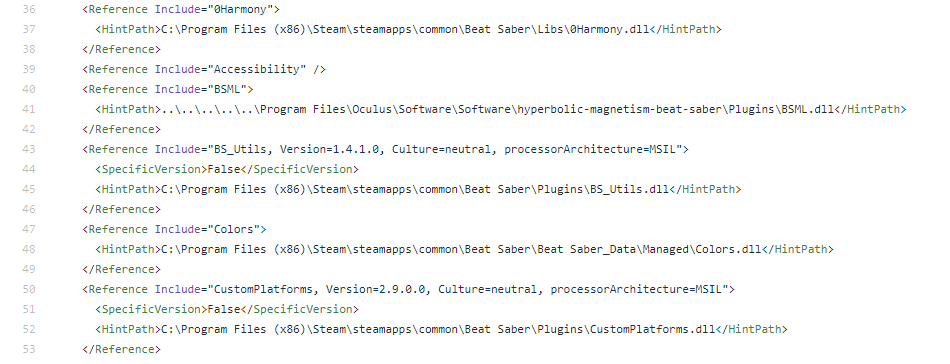 This is how dependencies look like for SongCore, one of the most important mods for Beat Saber (GitHub)
We can build the mod, copy the DLL file into the Beat Saber/Plugins folder and run the game. We don’t always need to run it with a VR headset. For a simple debug, we can use an fpfc command-line option.
"Beat Saber.exe" fpfc
The game will run in debug mode with mouse controls. It’s enough to click some buttons on the main menu and exit the game. After this, we can go to the Beat Saber/Logs/BeatSaberTimeTracker folder and check the _latest.log file.
[DEBUG @ 20:50:03 | BeatSaberTimeTracker] Init
[DEBUG @ 20:50:03 | BeatSaberTimeTracker] OnStart
[DEBUG @ 20:50:21 | BeatSaberTimeTracker] OnExit
It means the mod works.
Step 0 conclusion
Every game plugin must have an entry point. It is something like the main function in regular programs. The implementation depends on the exact mods injection method. It could be an interface, attributes/annotations, or just a method with a particular name.
Step 1: Show current time
At this step, the mod will start doing something useful but without interaction with the game code. Let’s show current local time and time spent in the current game session. We will use the single responsibility principle and create a new class, TimeTracker. The Plugin class is needed only to launch and initialize the mod; there must be no other logic.
TimeTracker creates a Canvas component with the world space render mode and adds a couple of text outputs. Objects are created in the Awake method:
private void Awake()
{
    Plugin.logger.Debug("TimeTracker.Awake()");

    GameObject canvasGo = new GameObject("Canvas");
    canvasGo.transform.parent = transform;
    _canvas = canvasGo.AddComponent<Canvas>();
    _canvas.renderMode = RenderMode.WorldSpace;

    var canvasTransform = _canvas.transform;
    canvasTransform.position = new Vector3(-1f, 3.05f, 2.5f);
    canvasTransform.localScale = Vector3.one;

    _currentTimeText = CreateText(_canvas, new Vector2(0f, 0f), "");
    _totalTimeText = CreateText(_canvas, new Vector2(0f, -0.15f), "");
}
The text outputs are created in the CreateText method:
private static TextMeshProUGUI CreateText(Canvas canvas, Vector2 position, string text)
{
    GameObject gameObject = new GameObject("CustomUIText");
    gameObject.SetActive(false);
    TextMeshProUGUI textMeshProUgui = gameObject.AddComponent<TextMeshProUGUI>();

    textMeshProUgui.rectTransform.SetParent(canvas.transform, false);
    textMeshProUgui.rectTransform.anchorMin = new Vector2(0.5f, 0.5f);
    textMeshProUgui.rectTransform.anchorMax = new Vector2(0.5f, 0.5f);
    textMeshProUgui.rectTransform.sizeDelta = new Vector2(1f, 1f);
    textMeshProUgui.rectTransform.transform.localPosition = Vector3.zero;
    textMeshProUgui.rectTransform.anchoredPosition = position;

    textMeshProUgui.text = text;
    textMeshProUgui.fontSize = 0.15f;
    textMeshProUgui.color = Color.white;
    textMeshProUgui.alignment = TextAlignmentOptions.Left;
    gameObject.SetActive(true);

    return textMeshProUgui;
}
This method looks a bit clumsy, but it does the same thing we would do in the Unity editor in case of normal development: it creates a GameObject, adds a TextMeshProUGUI component to it, and sets RectTransform parameters.
Here we meet a problem that we need to cope with when we develop mods: we don’t have the Unity editor. We can create assets in the Unity editor and load them as asset bundles, but we cannot open the existing game scenes in the editor and manage objects there. We need to do everything using code. That’s why we need to find object positions experimentally: try a transform configuration, build the mod, start the game, check the actual position, exit the game, try a new transform configuration, and so on. Repeat until it’s done.
To estimate UI positions, I created a 20x20 grid of text outputs, 400 in total. Each showed its coordinates on the canvas. It helped me to understand the coordinates and the scale of the game scenes.
Back to the mod. The Update method updates the text outputs:
private void Update()
{
    if (Time.time >= _nextTextUpdate)
    {
        _currentTimeText.text = DateTime.Now.ToString("HH:mm");
        _totalTimeText.text = $"Total: {Mathf.FloorToInt(Time.time / 60f):00}:{Mathf.FloorToInt(Time.time % 60f):00}";
        _nextTextUpdate += TEXT_UPDATE_PERIOD;
    }
}
TimeTracker is instantiated in the Plugin class in the OnStart method:
[OnStart]
public void OnStart()
{
    logger.Debug("OnStart");

    GameObject timeTrackerGo = new GameObject("TimeTracker");
    timeTrackerGo.AddComponent<TimeTracker>();
    Object.DontDestroyOnLoad(timeTrackerGo);
}
To protect the TimeTracker from being destroyed when a new scene is loaded, we need to either attach it to a scene that always exists or call DontDestroyOnLoad(…). The latter is easier.
We still need to resolve the dependencies. GameObject and MonoBehaviour are defined in UnityEngine.CoreModule.dll. TextMeshPro is in UnityEngine.UI.dll and Unity.TextMeshPro.dll. Canvas is in UnityEngine.UIModule.dll. The libraries can be found in the game folder with managed libraries.
Build the mod, copy it into the game folder, start the game.
Checking logs:
[DEBUG @ 21:37:18 | BeatSaberTimeTracker] Init
[DEBUG @ 21:37:18 | BeatSaberTimeTracker] OnStart
[DEBUG @ 21:37:18 | BeatSaberTimeTracker] TimeTracker.Awake()
[DEBUG @ 21:37:24 | BeatSaberTimeTracker] OnExit
[DEBUG @ 21:37:25 | BeatSaberTimeTracker] TimeTracker.OnDestroy()
Everything is fine, the mod works, and it isn’t useless anymore. It is not affected by the game and doesn’t affect the game. It has one issue, though: it is always visible even if we don’t need it, e.g., in the core game. We will fix it at the next step.
Step 1 conclusion
We don’t have source code, and therefore we cannot open it in the Unity editor and use the same tools developers use for normal development. Modders have to use additional tools and research source code by doing experiments and logging data to text files or UI.
Step 2: Interact with the game logic
At this step, we will start interacting with the game logic. The mod will track active time spent in the core gameplay and hide its UI when we don’t need it. To do this, we need to detect transitions between scenes.
I added a boolean variable _trackActiveTime to turn active time tracking on and off. And we also need to add a new text output _activeTimeText. It is created in the same way we did for other text outputs, but we set its position a bit lower this time. Let’s start with changing the Update method to track active time.
private void Update()
{
    if (_trackActiveTime)
    {
        _activeTime += Time.deltaTime;
    }

    if (Time.time >= _nextTextUpdate)
    {
        _currentTimeText.text = DateTime.Now.ToString("HH:mm");
        _totalTimeText.text = $"Total: {Mathf.FloorToInt(Time.time / 60f):00}:{Mathf.FloorToInt(Time.time % 60f):00}";
        _activeTimeText.text = $"Active: {Mathf.FloorToInt(_activeTime / 60f):00}:{Mathf.FloorToInt(_activeTime % 60f):00}";
        _nextTextUpdate += TEXT_UPDATE_PERIOD;
    }
}
_trackActiveTime is updated in a setter method:
private void SetTrackingMode(bool isTracking)
{
    _trackActiveTime = isTracking;
    _canvas.gameObject.SetActive(!isTracking);
}
In this method, we also hide/show the canvas with the text outputs because we don’t need it when we track active time in the core gameplay.
We need to make the game call this method when it switches between the main menu and the core gameplay. The easiest way to do it is to use events. Let’s start with the easy way and use a mod that simplifies the interaction with the game logic. We need BS_Utils. It must be already installed, and its DLL file can be found in the Beat Saber/Plugins folder. We need to add it to dependencies and the manifest.json:
  ...
  "dependsOn": {
    "BS Utils": "^1.4.0"
  },
  ...
BS_Utils contains a lot of static events connected to the game’s logic. We just need to pick the ones that we need and add delegates to them.
BSEvents.gameSceneActive += EnableTrackingMode;
BSEvents.menuSceneActive += DisableTrackingMode;
BSEvents.songPaused += DisableTrackingMode;
BSEvents.songUnpaused += EnableTrackingMode;
I added methods EnableTrackingMode and DisableTrackingMode to simplify the interface and to use them as delegates without arguments.
private void EnableTrackingMode()
{
    SetTrackingMode(true);
}

private void DisableTrackingMode()
{
    SetTrackingMode(false);
}
Let’s check if the mod works.
If we developed a regular Beat Saber mod, we could stop right now. The mod is ready; it does everything that we need and how we need it. It uses an external mod BS_Utils, but most of the mods have dependencies. However, this is a tutorial/research, so we need to go deeper.
Step 2 conclusion
If a game has a big modding community, it has probably already created many tools and libraries to simplify mod development. E.g. BS_Utils simplifies work with the Beat Saber logic and BSML allows to create UI panels using XML config files.
Step 3: Delete BS_Utils, use the game code directly
It’s time to jump into the Beat Saber code. At this step, we need to remove BS_Utils from dependencies and manifest.json. Compiler notifies that the class BSEvents and its events are undefined now. We need to find a replacement for them.
menuSceneActive and gameSceneActive
These events are triggered when the active scene is changed: the main menu scene and the core gameplay scene correspondingly. Unity provides a static class SceneManager to work with scenes. It has sceneLoaded, sceneUnloaded, and activeSceneChanged events. Let’s add delegates for them to log something when they are called. SceneManager is defined in UnityEngine.CoreModule.dll, which we have already added, so there must be no issues with dependencies.
private void Awake()
{
    ...
    SceneManager.sceneLoaded += OnSceneLoaded;
    SceneManager.sceneUnloaded += OnSceneUnloaded;
    SceneManager.activeSceneChanged += OnActiveSceneChanged;
    ...
}

private void OnSceneLoaded(Scene scene, LoadSceneMode mode)
{
    Plugin.logger.Debug("OnSceneLoaded: " + scene.name + " (" + mode + ")");
}

private void OnSceneUnloaded(Scene scene)
{
    Plugin.logger.Debug("OnSceneUnloaded: " + scene.name);
}

private void OnActiveSceneChanged(Scene previous, Scene current)
{
    Plugin.logger.Debug("OnActiveSceneChanged: " + previous.name + " -> " + current.name);
}
Logs output:
[DEBUG @ 14:28:14 | BeatSaberTimeTracker] Plugin.Init
[DEBUG @ 14:28:14 | BeatSaberTimeTracker] Plugin.OnStart
[DEBUG @ 14:28:14 | BeatSaberTimeTracker] TimeTracker.Awake()
[DEBUG @ 14:28:15 | BeatSaberTimeTracker] OnSceneLoaded: EmptyTransition (Additive)
[DEBUG @ 14:28:15 | BeatSaberTimeTracker] OnActiveSceneChanged: PCInit -> EmptyTransition
[DEBUG @ 14:28:15 | BeatSaberTimeTracker] OnSceneLoaded: MainMenu (Additive)
[DEBUG @ 14:28:15 | BeatSaberTimeTracker] OnSceneLoaded: MenuCore (Additive)
[DEBUG @ 14:28:15 | BeatSaberTimeTracker] OnSceneLoaded: MenuEnvironment (Additive)
[DEBUG @ 14:28:15 | BeatSaberTimeTracker] OnSceneLoaded: MenuViewControllers (Additive)
[DEBUG @ 14:28:15 | BeatSaberTimeTracker] OnActiveSceneChanged: EmptyTransition -> MenuViewControllers
[DEBUG @ 14:28:15 | BeatSaberTimeTracker] OnSceneUnloaded: EmptyTransition
[DEBUG @ 14:28:22 | BeatSaberTimeTracker] OnSceneLoaded: BigMirrorEnvironment (Additive)
[DEBUG @ 14:28:22 | BeatSaberTimeTracker] OnSceneLoaded: StandardGameplay (Additive)
[DEBUG @ 14:28:23 | BeatSaberTimeTracker] OnSceneLoaded: GameplayCore (Additive)
[DEBUG @ 14:28:23 | BeatSaberTimeTracker] OnSceneLoaded: GameCore (Additive)
[DEBUG @ 14:28:23 | BeatSaberTimeTracker] OnActiveSceneChanged: MenuViewControllers -> GameCore
[DEBUG @ 14:28:29 | BeatSaberTimeTracker] OnActiveSceneChanged: GameCore -> MenuViewControllers
[DEBUG @ 14:28:29 | BeatSaberTimeTracker] OnActiveSceneChanged: MenuViewControllers -> MainMenu
[DEBUG @ 14:28:29 | BeatSaberTimeTracker] OnActiveSceneChanged: MainMenu -> MenuCore
[DEBUG @ 14:28:29 | BeatSaberTimeTracker] OnActiveSceneChanged: MenuCore -> MenuEnvironment
[DEBUG @ 14:28:29 | BeatSaberTimeTracker] OnActiveSceneChanged: MenuEnvironment -> MenuViewControllers
[DEBUG @ 14:28:29 | BeatSaberTimeTracker] OnSceneUnloaded: BigMirrorEnvironment
[DEBUG @ 14:28:29 | BeatSaberTimeTracker] OnSceneUnloaded: StandardGameplay
[DEBUG @ 14:28:29 | BeatSaberTimeTracker] OnSceneUnloaded: GameplayCore
[DEBUG @ 14:28:29 | BeatSaberTimeTracker] OnSceneUnloaded: GameCore
[DEBUG @ 14:28:34 | BeatSaberTimeTracker] Plugin.OnExit
[DEBUG @ 14:28:34 | BeatSaberTimeTracker] TimeTracker.OnDestroy()
We have many different scenes because Beat Saber stores different components in different scenes and loads them together in Additive mode. E.g., a scene for UI, a scene for the environment, a scene for a player, etc. We can look at the logs and make a couple of conclusions. First, we can detect the core gameplay start by checking if the GameCore scene is active. In the same way, we could use MenuCore to detect if a player returns to the main menu, but the problem of MenuCore is that there is no OnActiveSceneChanged call for MenuCore when we load the game, only when we return from the core gameplay. The MenuViewControllers scene makes more sense in this case.
Another conclusion is that menu scenes are loaded once the game starts and are inactive in the core gameplay. Core game scenes are loaded on each gameplay start and unloaded when we are back to the main menu.
So, we need to check an active scene name in the delegate and toggle active time tracking.
private void OnActiveSceneChanged(Scene previous, Scene current)
{
    Plugin.logger.Debug("OnActiveSceneChanged: " + previous.name + " -> " + current.name);
    switch (current.name)
    {
        case "MenuViewControllers":
            DisableTrackingMode();
            break;

        case "GameCore":
            EnableTrackingMode();
            break;
    }
}
songPaused and songUnpaused
To replace these events, we need to use the game code. So, this is the time when the actual reverse engineering is taking place. There are two libraries containing the game code: Main.dll and MainAssembly.dll. They can be found in the Beat Saber/Beat Saber_Data/Managed folder. For some reason, they both contain definitions of the same classes, but the game uses Main.dll, not MainAssembly.dll. I’ve spent two days debugging a strange behavior because I tried to use MainAssembly.dll first. I tried to get an instance of a component defined there, but it always returned null even though I was sure it was in the scene hierarchy. Apparently, classes with the same names and the same definitions are not the same if they are defined in different assemblies. So, the right one is Main.dll. After I added it to the project, everything started to work as expected, and I convinced myself that I wasn’t crazy.
We need to get class definitions from Main.dll somehow. To do this, we need a decompiler. BSMG recommends to use dnSpy. It is a decompiler and a debugger able to attach to a Unity process. I use Rider as an IDE, and it contains its decompiler. Both are ok, I guess.
Here the most boring thing (arguably) starts. We need to use a decompiler to decompile Main.dll and read the game code. Just read and search for something that looks like a class that does what we are going to modify.
Sooner or later, we will find a GamePause class responsible for setting the game on pause. It has two methods: Pause and Resume, and two events: didPauseEvent and didResumeEvent. These events are the ones that were used by BS_Utils so that we can do the same.
We need to get a reference to an instance of the GamePause component. In Unity, it can be done this way:
Resources.FindObjectsOfTypeAll<GamePause>();
This method doesn’t care about a scene a component is attached to or whether it is active or not. If a component is instantiated, it will be found. We have already learned that game core scenes are created every time we start the core gameplay. We can use OnSceneLoaded and OnActiveSceneChanged delegates to detect core gameplay start, call FindObjectsOfTypeAll and get an instance of GamePause. The problem is that this component might be created dynamically after the scenes are loaded and be null at the time the delegate is called. One of the solutions here is to try getting a component every frame until it is created. E.g., using a coroutine:
IEnumerator InitGamePauseCallbacks()
{
    while (true)
    {
        GamePause[] comps = Resources.FindObjectsOfTypeAll<GamePause>();
        if (comps.Length > 0)
        {
            Plugin.logger.Debug("GamePause has been found");
            GamePause gamePause = comps[0];
            gamePause.didPauseEvent += DisableTrackingMode;
            gamePause.didResumeEvent += EnableTrackingMode;
            break;
        }

        Plugin.logger.Debug("GamePause not found, skip a frame");
        yield return null;
    }
}
.First() or .FirstOrDefault() from LINQ can be used instead of raw arrays here. It’s a matter of code style.
We can start it in OnActiveSceneChanged:
private void OnActiveSceneChanged(Scene previous, Scene current)
{
    Plugin.logger.Debug("OnActiveSceneChanged: " + previous.name + " -> " + current.name);
    switch (current.name)
    {
        case "MenuViewControllers":
            DisableTrackingMode();
            break;

        case "GameCore":
            EnableTrackingMode();
            StartCoroutine(InitGamePauseCallbacks());
            break;
    }
}
If we build and test the mod, we will find out that the GamePause component is found in the coroutine’s first frame. It means we don’t need a coroutine there and can replace it with a single FindObjectsOfTypeAll call.
Step 3 conclusion
To create a mod for a game, we need to know the game’s code and architecture. To do this, we need to spend a lot of time with a decompiler staring at the different classes defined in the game’s assemblies and trying to find the one that does the thing that we want to modify.
Step 4: Intervene in the game’s logic using Harmony
Harmony is a library for C# code modification used by many modders in many games. It was created by Andreas Pardeike (website, GitHub). Unlike Mono.Cecil, which modifies DLL files with .NET assemblies, Harmony modifies code in runtime. It can only modify methods, but this is enough because, in most cases, we want to modify behavior, not a state. There are other ways to modify state, including native ones, e.g., reflection.
Harmony modifications are called patches. There are several types of patches:
- Prefix. This patch is called before the modified method. It can be used to catch and change method arguments and decide if the original method must be called or skipped.
- Postfix. This patch is called after the modified method. It can be used to catch and modify the returned value.
- Transpiler. This patch modifies the method’s IL code. It can be used to modify the behavior of the original method.
- Finalizer. This patch is like “catch” and “finally” at the same time. It can be used to handle exceptions and to run mandatory finalizing code.
The most popular patches are Prefix and Postfix. Transpiler is too complicated because of the IL code manipulation. Finalizer sounds useful, but it has just been added recently in Harmony 2.0, so I haven’t seen examples of its usages yet.
The mod we are developing here is too simple to use Harmony, so let’s artificially make it harder. Let’s imagine that GamePause doesn’t have the songPaused and songUnpaused events. In this case, we need to modify the Pause and Resume methods.
I’m still using the single responsibility principle, so I created a new class HarmonyPatcher with a single method: public static void ApplyPatches() {}. It contains something like this:
Harmony harmony = new Harmony("com.fck_r_sns.BeatSaberTimeTracker");
harmony.PatchAll(Assembly.GetExecutingAssembly());
These two lines are enough to install all the patches we have in the mod. “com.fck_r_sns.BeatSaberTimeTracker” is a package name; it must be unique to avoid collisions with other mods. I call HarmonyPatcher.ApplyPatches() from Plugin.OnStart() before TimeTracker is created.
For each method that we want to modify, we need to create a class. Each patch is a static method in this class. One method can have many patches. Patches can be defined using methods with particular names (Prefix, Postfix, etc.) or by using attributes. I prefer attributes because they make code easier to read. Let’s create simple Postfix patches that log some text.
[HarmonyPatch(typeof(GamePause), nameof(GamePause.Pause), MethodType.Normal)]
class GamePausePausePatch
{
    [HarmonyPostfix]
    static void TestPostfixPatch()
    {
        Plugin.logger.Debug("GamePause.Pause.TestPostfixPatch");
    }
}

[HarmonyPatch(typeof(GamePause), nameof(GamePause.Resume), MethodType.Normal)]
class GamePauseResumePatch
{
    [HarmonyPostfix]
    static void TestPostfixPatch()
    {
        Plugin.logger.Debug("GamePause.Resume.TestPostfixPatch");
    }
}
The [HarmonyPatch] attribute defines a patched method. [HarmonyPostfix] means that the marked method is a Postfix patch.
Logs show that the patches are applied:
[DEBUG @ 16:21:55 | BeatSaberTimeTracker] Plugin.Init
[DEBUG @ 16:21:55 | BeatSaberTimeTracker] Plugin.OnStart
[DEBUG @ 16:21:55 | BeatSaberTimeTracker] HarmonyPatcher: Applied
[DEBUG @ 16:21:55 | BeatSaberTimeTracker] TimeTracker.Awake()
And that the Postfix patches work:
[DEBUG @ 16:22:24 | BeatSaberTimeTracker] GamePause.Pause.TestPostfixPatch
[DEBUG @ 16:22:31 | BeatSaberTimeTracker] GamePause.Resume.TestPostfixPatch
Now we can start implementing some logic. We need to toggle active time tracking in the Postfix patches. Here we meet one of the main limitations of Harmony patches: they are static. TimeTracker is a component in a scene hierarchy, and it’s not static. I see two proper ways to solve this problem.
The first one is to make TimeTracker available from a static context: either to make it a singleton or to call Resources.FindObjectsOfTypeAll() from the patches. For example, BSEvents that we used at step 2 is a singleton.
private void Awake()
{
    if (Instance != null) return;
    Instance = this;
    ...
}
The second one is to add a helper class with static events. Postfix patches would fire the events, and TimeTracker would subscribe to these events. I prefer this option more because it provides low coupling.
namespace BeatSaberTimeTracker
{
    public static class EventsHelper
    {
        public static event Action onGamePaused;
        public static event Action onGameResumed;
    }
}
The Postfix patches must fire these events.
[HarmonyPatch(typeof(GamePause), nameof(GamePause.Pause), MethodType.Normal)]
class GamePausePatchPause
{
    [HarmonyPostfix]
    static void FireOnGamePausedEvent()
    {
        EventsHelper.FireOnGamePausedEvent();
    }
}

[HarmonyPatch(typeof(GamePause), nameof(GamePause.Resume), MethodType.Normal)]
class GamePausePatchResume
{
    [HarmonyPostfix]
    static void FireOnGameResumedEvent()
    {
        EventsHelper.FireOnGameResumedEvent();
    }
}
I added public methods FireOnGamePausedEvent and FireOnGameResumedEvent because events cannot be triggered outside the class. The TimeTracker class can subscribe to these events now.
If we build and run the mod, we will see that it works. But there is one detail missing. There is a protection from double pausing in the GamePause class:
if (this._pause)
  return;
this._pause = true;
…
The Postfix patches are called regardless of the Pause method being called properly or by double calling. We need to test if the game is already paused when the Pause method is called (or unpaused for the Resume method) and do not fire the event if the pause state is not changed. We need to know the pause state before the original method call, and it means we need to add Prefix patches.
Harmony can inject different variables into patches:
- Method arguments. The ones that are passed to the original method.
- __instance. The reference to an object for which the method is called. It works in the same way as “this”.
- __state. We can share state between patches. It’s a single value variable, so if we need to share multiple values, we need to create a class or a structure.
- __result. The returned value.
- Private fields. We can add an argument with the same name as a class’ private field, but with three additional underscore characters at the beginning of its name. Harmony will inject this private field into a patch.
Let’s define a state struct.
struct PauseState
{
    public bool wasPaused;
}
To share the state, we have to use an argument with the fixed name __state. To make the code clearer, I would use a custom struct even though there is only one variable. PauseState __state is more clear than just bool __state.
The Prefix patch just stores a current pause state:
[HarmonyPrefix]
static void CheckIfAlreadyPaused(out PauseState __state, bool ____pause)
{
    __state = new PauseState { wasPaused = ____pause };
}
State is passed with the “out” keyword to let the patch write the value. The Postfix patch compares the pause state before the original method call and the current state. If it is changed, it fires the event.
[HarmonyPostfix]
static void FireOnGamePausedEvent(PauseState __state, bool ____pause)
{
    if (!__state.wasPaused && ____pause)
    {
        EventsHelper.FireOnGamePausedEvent();
    }
}
If we build the mod and test it, we will see that everything works.
Step 3 conclusion
Harmony is very useful and important for the modding community. It is used in RimWorld, Battletech, Cities: Skylines, Kerbal Space Program, Oxygen Not Included, Stardew Valley, Subnautica, and many other games.
***
Mods development is a tedious process sometimes. You need to research decompiled game code, look for classes that you need to modify, rebuild mods to test changes in a game, and develop Unity code without Unity editor.
Then game developers update their game and change the classes that you have modified. And you need to start again.